I
UPDATE: Link to my published SugarCRM-CE-V6 appliance [here] in SUSE Gallery.
1) Downloaded SugarCE-6.0.0.zip (latest version at this time) and opened the online V6 documentation with reference to its Installing and Upgrading Sugar chapter.
2) Logged into SUSE Studio and created a base 32bit SUSE Linux Enterprise Server 11 SP1 appliance.


This is the easiest part.
")
3) Looking over the Sugar docs briefly, it requires Apache2, PHP5 and MySQL5. Once these components are available and running, we just need to unzip the SugarCE-6.0.0.zip file into the document root of the webserver (apache2). Thereafter, we use a web browser to access the installation wizard to proceed. Sounds easy enough, so off I went to install the lamp_server pattern under the Software section. Remember to click the +add all button to also install MySQL, after adding the lamp_server pattern.


4) Next, in the Configuration section and General sub-section, I set my default time zone to Singapore (where I'm based). I chose this option instead of the "Ask on first boot". Since I will be using the Testdrive feature later to iteratively get this appliance setup correctly, I do not want to waste cycles answering which region/country I'm in while waiting for my appliance to boot online. I will change this to the more intuitive "Ask on first boot" once my appliance is ready for prime time. This same idea applies to the Network setting of "Discover network settings automatically (DHCP)" for now.
I also chose to set my root password to sugar and also created a normal user called suger with password sugar. Finally, opened up the SSH port and HTTP ports in the firewall so that I can test my appliance when it runs online via the Testdrive feature.

5) On a more frivolous side, I uploaded a SugarCRM logo in the Personalize section. Also elected to go with the default blue background (SLES 10 theme) as opposed to the green background (SLES 11 theme). Blue just goes better with the SugarCRM logo... since this is an appliance, not many people outside of SUSE will even be bothered what color and its corresponding SLES version. So just an artistic decision, if I have more time and/or talent, I could always create my own background and upload it... never mind...

For the remainder subsections under Configuration, I've elected to use the default settings for now. I can always come back to alter it as necessary.
6) In the Files section, this is where I upload my previously downloaded SugarCE-6.0.0.zip file. SUSE Studio will automatically unzip this file (or any other supported filetypes like tar, tar.gz etc). We need to tell it the location we would like it to be unzipped. With reference to Sugar docs, I set the target location to be Apache2's default web document root directory at /srv/www/htdocs. I've also changed the Owner/Group settings to wwwrun:www as these are the default webserver user:group in SLES.

I realized that I need to rename the unzipped directory SugarCE-Full-6.0.0 under /srv/www/htdocs. The reason is simple, its going to be difficult to remember/memorize this URL when accessing Sugar's installation wizard via the web browser: http://[IP addr]/SugarCE-Full-6.0.0/install.php. Makes more sense if its can be shortened in a simpler form like: http://[IP addr]/sugar/install.php.
To achieve this, I will need to rename this whenever the appliance is built. Noticed that SUSE Studio does not have an option (at this time?) that allows me to easily change the final directory name but instead will use the directory name as setup in the zip file. Not a problem as I can use custom Scripts sub-section under Configuration, I checked the Run script at the end of the build checkbox and entered the following line at the end:
mv /srv/www/htdocs/SugarCE-Full-6.0.0 /srv/www/htdocs/sugar

7) Finally, I'm ready to build and test the first iteration of my Sugar appliance. In the Build section, I accepted the default format USB / hard disk image and click Build. To use the Testdrive feature, we need to have a hard disk image. Once we are satisfied with our setup, we can build other formats like Xen, VMWare and ISOs. I also accepted the default version at 0.0.1.

8) Once the build is completed, I trigger the Testdrive feature to poke around and try out my first iteration. After clicking on the Testdrive icon, a new browser tab will appear (I'm using Firefox) and the Testdrive is underway.

Notice the 3 tabs: Test Drive, Modified Files and Networking. The Test Drive tab shows the VNC view of the running appliance and the time left before its shutdown (1 hour limit).
The Modified Files tab is very interesting and useful tool as it monitors files that has been modified as we are testing the appliance. Since the Testdrive session does not save your work or changes, the Modified Files section becomes useful as it will help take important files that you've modified and add them back via the Files section. Note this is a manual step that you have to initiate.
Finally, the Networking tab, defaults to off, enables you to turn on networking so that you can test your web applications from your browser. I always turn this ON as my appliance is running online somewhere (Germany?) and I would like to test my web applications via my web browser on my machine.


For GUI lovers, you'll noticed that my appliance boots up to runlevel 3 or terminal view. From an appliance perspective, this is an advantage. I save on the physical footprint of my software appliance (its 790Mb & can be zipped up to 250Mb for download/transport), the running appliance will take up less RAM and since its an appliance that provides a web interface, I do not need a local GUI when deployed.
9) Upon logging onto my running appliance,
Tried to point my browser to the online appliance and realized that my apache2 web server is not running. No worries, its just not started by default... same goes for mysql. Fired them up via rcapache2 start and rcmysql start at the terminal.
My appliance ought to automatically start the all important web server and database server on boot. I went back to SUSE Studio and in the Configuration section, Scripts sub-section, I checked the Run script whenever the appliance boots checkbox and entered the following 2 lines in BOLD inside the firstboot clause:
if [ -f /etc/init.d/suse_studio_firstboot ]
then
# Put commands to be run on the first boot of your appliance here
echo "Running SUSE Studio first boot script..."
insserv apache2
insserv mysql
fi
This will ensure that in my next iteration or build (0.0.2), both my apache2 and mysql servers will be started up on boot.
10) Pointing my browser to the running appliance online and appending the /sugar/install.php, I find myself looking at a running SugarCRM installation wizard.


Noted that the PHP configuration file location, as informed by the wizard, is at /etc/php5/apache2/php.ini . Off I go and had a quick look at the file (via vi) and found, on line 455, the default value for variables_order is GPCS. Changed that value to EGPCS as needed by Sugar. Saved the file and restarted apache2 via rcapache2 restart. On the web browser with the Sugar Installation Wizard, I clicked the Re-check button and I'm down from three to two requisites not fulfilled. Hurray.
Since this testdrive session is stateless, the variables_order setting in PHP5 will revert back to GPCS instead of the desired EGPCS. Now is the time to use the Modified Files feature under Testdrive.
In the Modified Files tab of the SUSE Studio Testdrive, I entered the path (second text field) /etc/php5/apache2 to filter out all other files that has changed on the system since boot. Clicked Refresh Changes button and found the php.ini file that I've just modified has been detected. To further verify that the changed file contains the EGPCS value, I clicked on the Diff action associated with the file. Yes, its there.


I checked the checkbox for the php.ini file and clicked on Add selected files to appliance button. Once this action is complete, I verify that the php.ini file has really been added by going back to the SUSE Studio page under Files section. If you do not see the php.ini file, trying reloading the webpage via the browser. Yes, its now there next to the SugarCE-6.0.0.zip file. Good.

11) To resolve the remaining 2 requisites, I will need to install 2 more PHP5 modules (MySQL connectivity & MB String). But first, I do the right thing and power down my online appliance (not taking up testdrive space for other users). My preference is to issue poweroff command at the terminal as root. Once the appliance shutsdown, I close the associated browser window or tab.
Now, back to the SUSE Studio page and under Software section, I put "php5 mysql" the search field and found the first module called php5-mysql package. Clicked +add button next to it. Done. Next, I search for "php5 mb" and found php5-mbstring module and added it.


Now, back to the Build section, I entered 0.0.2 in the Version field to represent my 2nd iteration and clicked the Build button. This will take around 3-5 minutes... time for coffee break...

Again, to do the right thing, I usually delete the disk image created in my 1st iteration. This will free up some hard disk space on the SUSE Studio site for other users. However, I only do so after I've successfully built my 2nd iteration and have it running under Testdrive.
12) Once my 0.0.2 disk image has been built, I put it into Testdrive mode and have it boot online for my second round of testing. I verified that both the apache2 and mysql servers are started automatically on boot now. Next, I inspected the /etc/php5/apache2/php.ini file and verified the right value of EGPCS is set for the variables_order setting.
On a new tab in my web browser, I surfed to my online appliance http://[some-suse-studio-node]:16080/sugar/install.php and tried to install my SugarCE V6 again. SUCCESS! I passed the Systems Pre-req tests and see the Choose Install Type option. Chose Typical and clicked Next. It automatically detected MySQL as the database and I clicked Next.
Under Database Configuration, I change the Host Name to 127.0.0.1 (accepting the default does not work as this appliance does not have its hostname set and its running under Testdrive). Since I did minimal for MySQL setup, I entered root for the Database Admin Username and left the Password field blank. I chose to Populate Database with Demo Data and clicked Next.

Under Site Configuration, I set the Sugar Admin user (admin) with password sugar and clicked Next. Now comes the next interesting part...
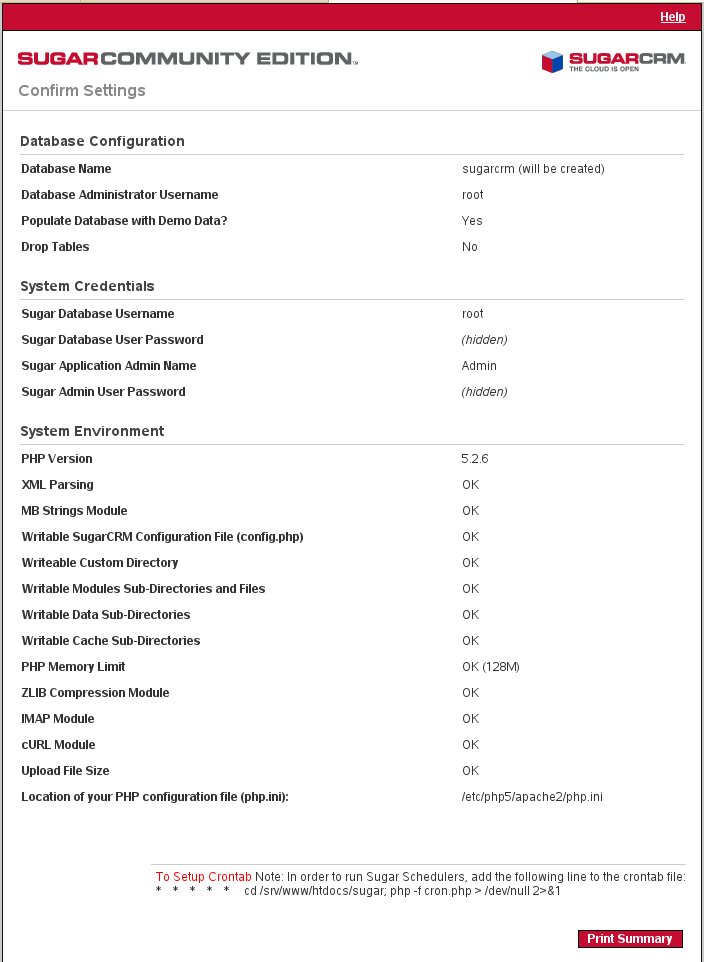
In Confirm Settings, I noticed that the Sugar Wizard is hinting (in RED) that I should install ZLIB Compression, IMAP and cURL modules. It also wanted the minimum upload file size to be set for at least 6MB. Again, I noted that I need to modify my php.ini file under /etc/php5/apache2/ directory. Also noted that to enable Sugar Schedulers, I will need to modify my /etc/crontab file.
Using the technique described in steps 10-11, I modified the /etc/php5/apache2/php.ini file to increase the value of upload_max_filesize setting from 2M to 12M (this can be any value higher than 6M). Ensured this change is added back into the Files section. Did the same for the /etc/crontab file that I added the line
* * * * * cd /srv/www/htdocs/sugar; php -f cron.php > /dev/null 2>&1

For the additional PHP5 modules, from Software section, I found and added the recommended 3 packages of php5-zlib, php5-imap and php5-curl.
13) Powered-off my 2nd iteration, deleted the 1st iteration image. Built my 3rd iteration versioned 0.0.3. Started my 3rd iteration under Testdrive and stepped through the Sugar Installation Wizard. Now it looks good.
Clicked on Install button and watch it go.... and complete and clicked Finish.

Logged into the newly installed SugarCE system with admin:sugar, answered a few more pages of info and viola!

Conclusions
There you have it, my half-day iterative approach in creating a SugarCE appliance.
I hope this journal will be useful in a few ways:a) It will help newer users be familiar with and leverage the features and tools within SUSE Studio
b) It will help the SUSE Studio engineers capture the usage pattern of ordinary folks (like me) and drive improvements to an already great project/service
c) It will get good feedback and suggestions in the comments section... I'm sure my method is not perfect or optimal so if anyone out there has a better methodology to speed up appliance creation, I would greatly appreciate your inputs in the comments section of this blog entry.
The biggest room in the world is the room for improvement. I can think of two areas of enhancements at this stage. Securing the appliance by securing MySQL/Apache2 with AppArmor. Making the end user experience smoother by having a simple GUI screen appear after the appliance boots with instructions on how to use web browser to assess the /sugar/install.php page to proceed with SugarCE installation.
Finally, as you can see, the value of SUSE Studio is its ability to rapidly create software appliances by your software engineers, application deployers and techie folks with the proper know-how. The end result is a better end-user experience (not shown here in this blog entry) where they download the pre-installed, pre-configured software appliance as a VMWare or Xen image and have it running in under 10 minutes.
")
Thank you for reading this long post. Cheers!
Wow, really cool to see how easy it is to do something like that... And it's also a good showcase for SugarCRM :D
ReplyDeleteThanks jospoortvliet. :)
ReplyDeleteYes, SugarCRM should use SUSE Studio to build their own appliances and offer it (Xen, VMWare or Live CD) freely on their website, in addition to their FastStack Installer for Linux.
Let's see if they will contact me or the SUSE Studio team. :)
I am glad to read this post because it gives very useful information about this software application and testing phase of it.
ReplyDeleteSo thanks to this post owner.
-online testing
The only thing that I would change is probably instead of renaming the sugar directory, I would change the DocumentRoot in httpd.conf :) But good one.
ReplyDeleteNice blog to read. You may like to visit authorized SugarCRM partners site which will give you the best services in usa uk canada and in your region.
ReplyDeleteSugarCRM partners australia
SugarCRM partners sydney