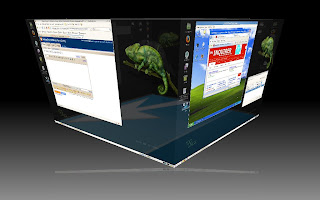
YES! I did it! I've moved all my machines from SUSE Linux Enterprise 10 SP2 to SUSE Linux Enterprise 11.

As you can see from the screenshot above, 3D effects (Desktop Cube) with Windows XP running as a virtual guest on Xen on the right.
Those who knows me understands that this is not just about popping in a DVD and installing a vanilla OS. To be truly productive in my environment, I need to be sure (ie test, test, test) this new SLE 11 can meet and/or exceed my expectations on function/feature and interoperability with my essential applications.
So here is my first entry on how I customized my SUSE Linux Enterprise Desktop 11. I need desktop applications and eye-candy (3D effects) as well as the Xen virtualization engine. On my Thinkpad T61p, I have an nVidia Quadro FX570M. I want to be able to boot into a Xen kernel and still have the wonderful 3D desktop effects.
Pre-Reqs: Ensure you have installed the
C/C++ Compiler and Tools installation pattern and the
kernel-source package.
1) Download the latest nVidia Linux driver. At the time of this writing, its version 180.44. To find out which is the latest driver, check out this
sticky thread on nvnew.net. Alternatively, you can go directly to nvidia.com, provide information on your card and have it re-direct you to the right driver via this
link.
Note 1: Since this is a proprietary driver, obviously it would not be packaged with the default SLED 11. Nonetheless, upon vanilla install, the open source nv driver did a good job and was able to display high-res (1920x1200). Unfortunately, I did not have as much luck enabling the 3D desktop effects.
Note 2: The steps below is considered a
manual/hard way of installing nVidia drivers. The advantage is you can use the latest (greatest?) driver from nVidia immediately. However, the down-side is you will need to recompile this driver every time you upgrade your Linux kernel (all other updates are ok). For an
easier way, also known as the repository way where we use the nVidia Online Repository via YaST, to download and automatically install pre-compiled drivers. Please refer to these online docs [
here and
here] for a general idea between these 2 install options.
2) With SLED 11 (default, non-Xen kernel) running, switch to TTY1 (Ctrl-Alt-F1). Login as root and switch to runlevel 3 via the command <
init 3>. Execute the NVIDIA driver you have downloaded. You might need to make that driver executable first via <
chmod +x NVIDIA-Linux-x86_64-180.44-pkg2.run > and execute it <
./NVIDIA-Linux-x86_64-180.44-pkg2.run >
The driver installation program is rather straight-forward (most of the time just hitting Enter and choosing Yes). The program will inform you it cannot find any pre-compiled driver, just hit Enter and it will go ahead and compile the driver for SLED 11. If you are running a 64-bit SLED 11, it will offer to install 32-bit compatible "stuff", just accept it with Yes. Finally, it will offer to edit your configuration files, accept it with Yes. Easy.

Finally, edit the
/etc/X11/xorg.conf file and change "Off" to "On" in the following line:
Section "Extensions" Option "Composite" "on"EndSection3) Test that the nVidia driver works by going back to runlevel 5 via the command <
init 5>. You should get full GUI. Log in and enable the 3D desktop effects
Computer -> Control Center -> Look & Feel -> Desktop Effect. Check the
Enable desktop effects checkbox.
Tip: After clicking on the checkbox, a dialog box asking if you want to keep the new settings appear.
WAIT! DO NOT click Yes for another 3-5 seconds. This allows time for the 3D engine to initialize and should anything go wrong, it will revert back to 2D in 30 seconds automatically. Only when you see 3D effects (ie try moving the opened windows around), then click Yes on the dialog box to keep these settings.
4) As root, copy the compiled nvidia driver to another location and rename it for safe keeping. This is important because you will need to run the nVidia installer program again against the Xen kernel. This process will over-ride and remove this previously compiled driver for the default kernel.
As root and in your root directory (/root), execute the following command:
< cp /lib/modules/2.6.27.19-5-default/kernel/drivers/video/nvidia.ko ./nvidia.ko.default >
5) Reboot SLED 11 into the Xen kernel. You should fail to enter runlevel 5 (Full GUI) as the required nVidia driver for Xen has not been compiled yet. Log in as root on TTY1 and Re-run the nVidia installation program but do it via this "magic" line:
<
IGNORE_XEN_PRESENCE=y CC="gcc -DNV_VMAP_4_PRESENT -DNV_SIGNAL_STRUCT_RLIM" ./NVIDIA-Linux-x86_64-180.44-pkg2.run >
The nVidia driver installation program will run again (see step 2) and this time, it will compile the driver against the Xen kernel. Highly recommend you take a copy of the newly compile nVidia driver:
< cp /lib/modules/2.6.27.19-5-xen/kernel/drivers/video/nvidia.ko ./nvidia.ko.xen >
Once successfully completed, go into runlevel 5 and voila!
6) To ensure that you can have full desktop GUI and 3D effects on
both SLED 11 Default and Xen kernel, verify and copy the correct <
nvidia.ko> files previously backed up (nvidia.ko.default and nvidia.ko.xen) respectively to:
(nvidia.ko.default) ->
/lib/modules/2.6.27.19-5-default/kernel/drivers/video/nvidia.ko(nvidia.ko.xen) ->
/lib/modules/2.6.27.19-5-xen/kernel/drivers/video/nvidia.koDone and done!


